By Outdoor Next Editorial standards
On this page
Location & access
DOC track reference point, not a verified trailhead, entrance or the whole route. Check the official route directions before travel.
Official location informationLocation source
DOC track reference point, not a verified trailhead, entrance or the whole route.
Reference point: -41.57228, 173.14483. WGS84 coordinates retained at the official service's returned precision; decimal resolution is not survey accuracy. Source positional accuracy is not specified.
DOC Maps walking and tramping reference point (WGS84), exact official-page GUID / Department of Conservation. Checked 2026-10-12.
Key facts
- Distance
- Not confirmed on the checked DOC page; see individual route sections
- Walking time
- 8 days
- Track grade
- Advanced; Expert
- Location
- Mount Richmond Forest Park
- Dog access
- Dogs with a DOC permit only. Contact closest DOC office to get a permit. Other pets on conservation land rules.
Checked against official sources on 8 October 2026. Rules and conditions are set by Department of Conservation — confirm with them before you go.
Route overview
The Richmond Ranges Te Araroa Track is one of the most challenging parts of Te Araroa. You need advanced backcountry tramping skills and supplies for at least ten days.
This DOC directory entry covers Richmond Ranges Te Araroa route in Marlborough, within Mount Richmond Forest Park. Where DOC groups several walks, times and grades refer to the listed options rather than a single continuous itinerary.
Distance, time and grade
- Distance: Not confirmed on the checked DOC page; see individual route sections
- Walking time: 8 days
- DOC grade: Advanced; Expert
Access and alerts
Source checked 2026-10-08. This page is a dated snapshot, not a live track-status report. Check current DOC route information immediately before travelling. An absence of listed alerts does not establish that a route is open.
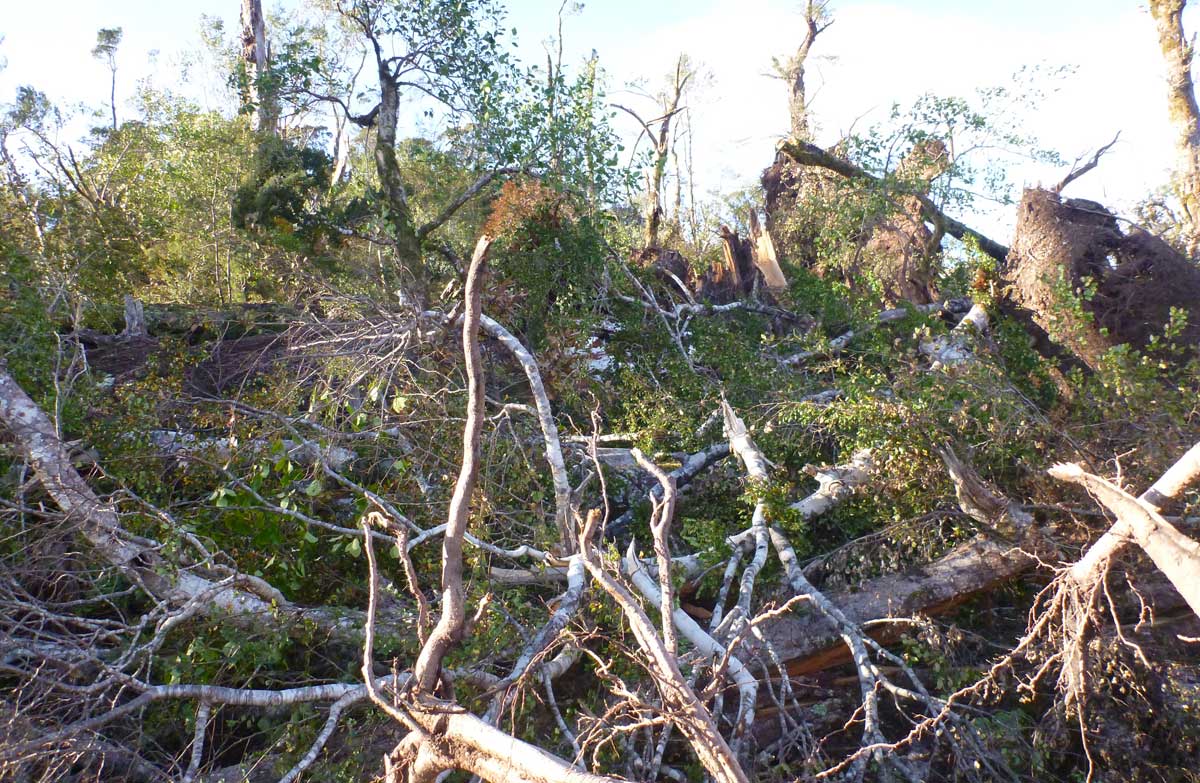
Windfall from Wairoa Gorge road end to Mid Wairoa Hut; First published on 2 October 2026.
Wilding conifer control operation for Motueka Gorge and Red Hills; First published on 25 July 2026.
Dog access
Dogs with a DOC permit only. Contact closest DOC office to get a permit. Other pets on conservation land rules.
Description
This track is part of Te Araroa Trail.
Roadend to Captains Creek Hut
Time: 4 hr
From the car park at the end of Mt Richmond Road, the track follows Te Hoiere/Pelorus River for an hour to Emerald Pool, an ideal fishing, swimming and picnicking spot. Beyond the pool, the track leaves the river and climbs a ridge, before zigzagging back down to the river and Captains Creek Hut.
Captains Creek Hut
Captains Creek Hut to Middy Creek Hut
Time: 2 hr
This section of track climbs up, sometimes steeply, and down from Te Hoiere/Pelorus River and its tributary creeks, crossing Captain Creek first, then the Pelorus and Fishtail Stream via swing bridges. From Fishtail Stream the track cuts across a broad loop in the river on a wide terrace. It rejoins the river and follows it to Middy Creek Hut.
Middy Creek Hut
Middy Creek Hut to Rocks Hut
Time: 3 hr
From Middy Creek Hut, cross a swing bridge and then climb for 20 minutes to a junction where the Pelorus Track branches left. The Rocks Track climbs steadily from the junction for about 600 m up a ridge. Passing through an area with many hummocks and rock outcrops, the track turns northwards and meets the Bryant Range near Rocks Hut.
Rocks Hut
Rocks Hut to Browning Hut
Time: 4 hr 30 min
The track leaves Rocks Hut. It crosses Rocks Creek and skirts around the side of The Rocks (939m), continuing on past various rocky outcrops and high points. At the track begins to descend to Tōtara Saddle, it passes through an open area of tussock, then re-enters the bush.
The descent becomes steeper as you approach Tōtara Saddle (690 m). From Tōtara Saddle, descend steeply for 30 min to Browning Hut beside Browning Stream.
Browning Hut
Browning Hut to Hacket Hut
Time: 1 hr
Just below Browning Hut cross Browning Stream and walk through a lovely section of forest. After the track junction, take the left-hand track towards Hacket Hut. The track crosses a small ridge, then follows a stream, crossing a few times down to Hackett Creek and Hacket Hut. Alternatively take the high river track.
Hacket Hut
Alternative entrance: Hacket Track to Hacket Hut
Time: 2 hr
You can also start the Richmond Ranges Te Araroa Track from the Hacket Track car park.
Hacket Track starts at the picnic area by the Hacket Track car park. It crosses a wooden bridge over the Roding River and, after 1 km, a suspension bridge across Hacket Creek.
The track follows the creek through private land before reaching a picnic area at the junction of Miner River and Hacket Creek. Continue along Hacket Track to Hacket Hut.
Be aware that multiple slips have occurred along the Hacket Track network and there is potential for further rockfall and riverbank erosion. The tracks are open and slip sections are marked with danger signs. Take care and follow any instructions on signs.
Read more about Hacket Track.
Hacket Hut to Starveall Hut
Time: 4 hr
From Hacket Hut the track continues upstream, crossing the creek a number of times. Crossing Hacket Creek should not be attempted during periods of heavy rain as the river can rise quickly. If you are not confident that you can cross safely, wait in one of the huts or in your tent/emergency shelter until river levels drop.
The track then sidles up towards the impressive Pyramid Rock. It then climbs steadily, before zig-zagging the final steep stretch to Starveall Hut. The hut is located at the edge of a large clearing on a spur below Mt Starveall.
Starveall Hut
Starveall Hut to Slaty Hut
Time: 2 hr 30 min
The Alpine Route begins from Starveall Hut and is marked with poles, leading up to the summit ridge of Mt Starveall. Watch the Alpine Route walk-through and safety video in the Know before you go section.
Halfway along the ridge, the route drops off to the left and descends to a distinct forested ridge that leads towards Slaty Peak. The route sidles across the northern face of Slaty Peak to Slaty Hut, located just above the bush line.
It is possible to detour to the Mt Starveall summit (1,511 m) en route to Slaty Hut, which provides magnificent views over Nelson and Tasman Bay.
Slaty Hut
Slaty Hut to Old Man Hut
Time: 5 hr
The track sidles around the basin below Slaty Peak, before climbing gradually back onto the main ridge, which is followed until Old Man Peak. The route is entirely above the bush line, except when it descends to forested saddles before Ada Flat and at the base of Old Man Peak.
There is a sign-posted junction at the summit of Old Man Peak (1514 m), with the left-hand route leading down to Lake Chalice or to the Forks/Top Valley.
The Richmond Ranges Te Araroa Track continues along the main summit ridge. Old Man Hut is in a natural grassy clearing 200 m below the ridge and is reached on a sign-posted access track.
Old Man Hut
Old Man Hut to Mt Rintoul Hut
Time: 5 hr
A sign-posted access track leads back to the main ridge, from which the Richmond Ranges Te Araroa Track climbs up blocky scree to the summit of Little Rintoul (1643 m). The route descends 250 m down a rocky ridge to a saddle, then climbs steeply again to the Mt Rintoul summit (1731 m).
This is the highest point of the track and is also the most difficult part. The terrain is steep and broken and can be treacherously icy during winter. Particular care should be taken.
From the summit, the route descends the summit ridge before dropping down scree slopes to the bush line. A short track then leads to Mt Rintoul Hut. Both the hut and Mt Rintoul summit offer magnificent views, particularly over the Waimea Plains and Tasman Bay.
From Old Man Hut, it is also possible to head directly down to the Goulter River.
Mt Rintoul Hut
Mt Rintoul Hut to Tarn Hut
Time: 5 hr
From Rintoul Hut, the Richmond Ranges Te Araroa Track leads through mountain beech forest to climb the scree and rock faces of Purple Top (1532 m), before descending down the main summit ridge. The route then sidles across the southern face of Bishops Cap (1425 m) to join the main forested spur to the south.
Tarn Hut is located at the edge of a small tarn, to the east of the main ridge, and is reached on a sign-posted access track.
Tarn Hut
Tarn Hut to Mid Wairoa Hut
Time: 4 hr
A sign-posted access track leads back to the main ridge. From there, the track leads down the ridge to a sign-posted junction shortly before Bushy Top, with the right-hand track leading to the Wairoa River Left Branch and Mid Wairoa Hut.
The track sidles on the western side of the ridge, eventually reaching a prominent spur which is followed to the left branch of the Wairoa River.
The final descent to the river is particularly steep. At this point, you arrive at Mid Wairoa Hut.
If you are finding the trip too difficult, are running out of supplies, or if bad weather is coming, you have two options to exit the track.
Mid Wairoa Hut
Exit options
Time: 5-6 hr
At the sign-posted junction shortly before Bushy Top (see above), the left-hand branch leads to the Goulter road end.
The track climbs over Bushy Top (1257 m) before descending a prominent spur to the Goulter River opposite Lower Goulter Hut. The river is not bridged and no attempt should be made to cross it while in flood.
From the hut, the track carries on for 45 minutes to a 4WD road end. It is a further two hours to Tiphead Stream, which is generally accessible to two-wheel drive vehicles.
Check the status of this road if you plan to use this exit. As of July 2023, the road was shut from Patriarch Station due to multiple washouts. It is approximately 14kms from the Goulter car park back to the gate at Patriarch station.
Time: 5 hr
A swing bridge crosses the river just downstream from Mid Wairoa Hut. The track follows the Wairoa River which has steep difficult sidles to negotiate, before opening out onto a forestry road. Follow the road for about 4 km until you reach the locked gate.
Mid Wairoa Hut to Top Wairoa Hut
Wairoa Track Nick Sutcliffe | Image: DOC
Distance: 8 kmTime: 4 hr 30 min
The track from Mid Wairoa Hut follows the river. It involves a lot of sidling, at times on steep terrain, and eight river crossings. Some trampers will find this section very challenging.
In some areas, the track is slippery and narrow and there are steep drops below the track. Take extreme care and go slowly to avoid falling.
It should not be attempted during periods of heavy rain as the river can rise quickly. If you are not confident that you can cross safely, wait in one of the huts or in your tent/emergency shelter until river levels drop.
Wairoa River Nick Sutcliffe | Image: DOC
Top Wairoa Hut
Top Wairoa Hut to Hunters Hut
Distance: 12 kmTime: 5 hr
The track leaves Top Wairoa Hut and climbs through alpine vegetation up to Mt Ellis (1615 m). It’s a great place to stop for lunch, with 360-degree views overlooking Tasman Bay and the Red Hills.
The track then descends to the left branch of the Motueka River. It follows the river, then crosses it (unbridged) and climbs to Hunters Hut.
Crossing the Motueka River should not be attempted during periods of heavy rain as the river can rise quickly. If you are not confident that you can cross safely, wait in one of the huts or in your tent/emergency shelter until river levels drop.
Hunters Hut
Hunters Hut to Porters Creek Hut
Distance: 9 kmTime: 4 hr
The track leaves Hunters Hut and sidles in and out of several gullies, following the edge of the Red Hills ultramafic area before reaching Porters Creek Hut.
Porters Creek Hut
Porters Creek Hut to Red Hills Hut
Distance: 11 kmTime: 5 hr
The track drops from Porters Creek Hut into Lowther Creek, then climbs up to a low saddle. After that, it sidles down to the right branch of the Motueka River and crosses it (unbridged). The track then sidles and climbs to the Red Hills Hut.
Crossing the Motueka River should not be attempted during periods of heavy rain as the river can rise quickly. If you are not confident that you can cross safely, wait in one of the huts or in your tent/emergency shelter until river levels drop.
Red Hills Hut
Red Hills Hut to Tophouse Road
Distance: 11.6 kmTime: 4 hr 30 min
From Red Hills Hut, the Te Araroa Track continues to climb Maitland Ridge for 7.9km to Beebys Knob Road. Then the Beebys Knob Road descends for 3.7km to meet Tophouse Road near the Lowther Road turnoff.
The trails around Red Hills and Beebys are shared-use tracks, with trampers and mountain bikers
Getting there
From the Nelson-Blenheim Road (SH6):
turn onto Maungatapu Road at Pelorus Bridge Scenic Reserve
continue on 13 km to the road end (the road becomes Mt Richmond Road)
this is the start of the Pelorus Track and the Richmond Ranges Te Araroa Route.
You can also enter the track at Hacket car park on the Aniseed Valley Road:
follow SH6 out of Nelson, heading south.
drive through Stoke and Richmond, then at Hope turn left onto Aniseed Valley Road
follow Aniseed Valley Road for 11.5 km (about 15 minutes)
turn off the road onto a gravel driveway, which leads a short distance to the Hacket Track car park. The turnoff from Aniseed Road has a DOC signpost for Hacket Track.
If you are travelling north on Te Araroa:
the track begins at Tophouse Road near the Lowther Road turnoff
it is 750m from Tophouse Road to SH63, and from there around 8km to St Arnaud.
Goulter Road is open to walkers and bikers only
This road is not suitable for vehicles.
Vehicles can park either before Patriarch Station at the start of the public easement, or approximately 2 km further along Goulter Road just prior to crossing Patriarch Stream.
It is 6 km from Patriarch Station or 4 km from the Patriarch Stream to the Mount Richmond Forest Park boundary. There is a locked gate just past Patriarch Stream.
Check the status of this road if you plan to use this exit. As of July 2023, the road was shut from Patriarch Station due to multiple washouts.
Know before you go
Expect a difficult tramp
The Richmond Ranges Te Araroa route is widely considered one of the hardest parts of Te Araroa. It has very challenging terrain, including extreme alpine weather, many unbridged river crossings and steep drop-offs. Even in summer there can be snow, freezing temperatures and flooded rivers.
Read about the trip carefully and decide if it is right for you.
Understand if you are ready for the Richmond Ranges Alpine Route
Watch the NZ Mountain Safety Council’s walk-through video which takes you through how to prepare for this track. Including facilities, key decision points, hazards and typical conditions for the area.
Take your time and pack well
Some people pack light and try to walk the Richmond Ranges route very quickly – we strongly recommend that you do not do this, as it leaves no backup for if things go wrong.
Bad weather and high rivers are common, so you need to have spare food so you can wait for conditions to improve. Sometimes you might need to wait for several extra days. Carry enough food for at least 10 days.
There is nowhere to buy extra supplies along the way. You must be completely self-sufficient, including packing a distress beacon and an emergency shelter. You can hire or buy distress beacons (see locations).
Wear good shoes and go slowly near steep drops
Some sections need to be walked slowly as the track is rough and very close to cliff edges. Wear boots with good grip and take your time, as a fall can be fatal.
Be especially careful between Old Man Hut and Rintoul Hut, and between Mid Wairoa and Top Wairoa Huts.
Be cautious with rivers – if in doubt, don’t cross
There are many unbridged river crossings on the trip. After rain, even small side creeks can turn deadly. People have died crossing Richmond Ranges rivers.
It’s important to carry a tent or other emergency shelter, so you can wait if the river levels are up.
Do not cross if the river is flooded, you cannot find safe entry and exit points or are unsure it’s safe. Turn back or wait for the river to drop. If in doubt, stay out.
How to cross rivers safely
Skills you need
To do this trip, you should
be fit enough to walk 6-8 hours a day for 10 days in rough, steep terrain
have experience in backcountry alpine tramping, including in untracked areas and in bad weather – you need to be able to judge when the conditions are safe to proceed and when to wait at a hut, camp where you are, or turn back
have navigation skills, eg are able to use GPS or a map and compass
have good river crossing skills
tramp with a companion – this is not recommended for solo tramping.
What to take
Weather changes quickly in the Richmond ranges, so pack for all conditions Image: DOC
warm and waterproof clothing is essential for the alpine environment
sturdy boots and walking poles will help you avoid twisted ankles
pack a tent and bedroll even if you plan to stay in huts – in case you don't get a bunk and for emergency shelter
pack a distress beacon and leave your intentions in the hut books of all huts you pass (not just where you stay)
water is scarce in summer – carry at least 3 litres per person and stay hydrated
wasps are common between January and April, so pack antihistamines and consider carrying an EpiPen
delays are likely, so pack extra food.
Multi-day tramping packing list
Sources and reuse
Route descriptions and practical information reproduced from the Department of Conservation, Crown copyright, under CC BY 4.0, subject to DOC's copyright policy. Formatting has been adapted, including flattening page sections; follow the original DOC page for maps, section-specific layout, current notices and linked documents. Outdoor Next is independent and is not endorsed by DOC.
The accompanying photograph is published in DOC's official route gallery with an explicit reuse licence. Its original caption and credit are retained; it does not establish current track conditions.